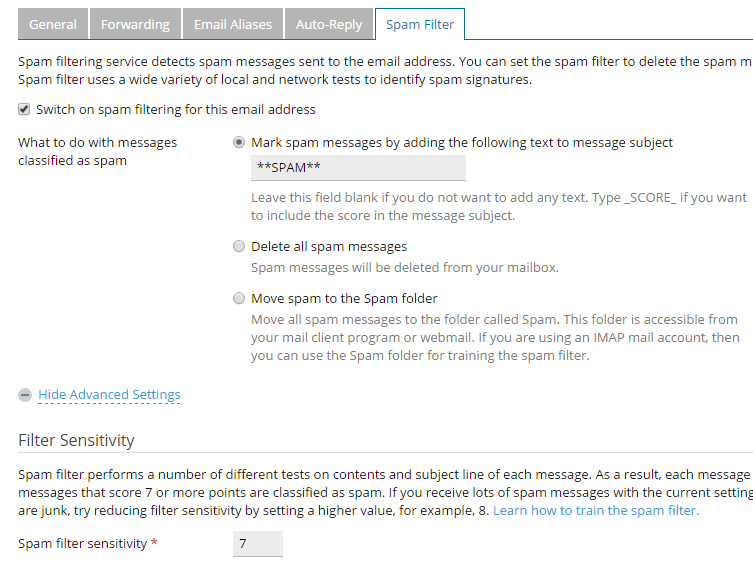
Your cloud shared hosting comes with a simple yet powerful anti-spam solution. It is activated on a per e-mail account basis:
1. Login to your control panel
2. Click on "Mail" in left hand menu.
3. Click on the e-mail address.
4. Spam Filter tab is the one that you want.
Anti-Spam Setting Explained
- Mark spam messages by adding the following text to message subject
This is handy if you want to setup a filter to deal with your spam. Set some thing like **SPAM** and have your filter deal with it as you like.
- Delete all spam messages
No explanation needed.
- Move spam to the Spam folder
Any and all spam identified by system gets put in "Spam". This folder is created if you select this option.
- Filter sensitivity
Pretty well explained already on the page. Be sure to check this page as well for additional information on tweeking and training your spam filter:
Additional Anti-Spam Information
- Whitelist
Make sure you add trusted senders here so they don't mistakenly get caught in the spam filter.
- Blacklist
If you find there are certain domains managing to slip through the anti-spam add them to the blacklist.


